In my previous blog (https://erichprogramming.code.blog/2020/02/23/learn-autohotkey-part-2/) I went through and introduced you to GUI or Graphical User Interface. In this blog I will teach you how to access SQLite with AutoHotKey created by Just Me which you can find here: https://github.com/AHK-just-me/Class_SQLiteDB.
Table of Contents
- Prerequisites
- Install SQLite
- Resources
- Create a script
Prerequisites
- SQL queries
- Flow control and loops
The prerequisites are the following: SQL queries is interacting in the database such as SELECT, INSERT, DELETE, UPDATE, how to create a script and how to run the script is needed. The basics can be found in the previous blogs in creating a simple script, in short understand the syntax, and how GUI works. Flow control is the flow of how the script is running and understand how an if statements works. To also add that wasn’t mention in the prerequisites list is that I will be going back and forth with Java as it is a common programming language and I’m very conformable with but it is not needed to understand the database.
Install SQLite
- Link 1: https://www.sqlite.org/download.html
- Link 2: https://www.autohotkey.com/boards/viewtopic.php?t=1064
- Link 3 (optional): https://sqlitebrowser.org/dl/
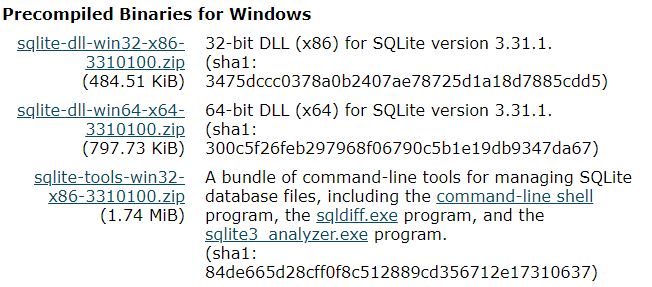
Link 1 is the SQLite database that we will be using, download the “Precompiled Binaries for Windows” and yes Windows because AutoHotKey can only be used in Windows. I only downloaded the 64-bit version, the SQLite tools are not needed.
Link 2 created by Just Me allows access to the database with AutoHotKey, click the hyper link “Download from GitHub” or download the master at the second link.
Link 3 is optional; this tool is used to see a GUI structure of the database that has been created and it’s not created with AutoHotKey.
Resources
- https://github.com/AHK-just-me/Class_SQLiteDB created by Just Me. This link will teach you the basic usage of the library.
- https://www.sqlite.org/docs.html SQLite Documentation. This link will teach you all about SQLite and the query statement that you may want to fully understand.
- Part 1: https://www.youtube.com/watch?v=Qq-Ic2-L0XE
- Part 2: https://www.youtube.com/watch?v=QQNMzPVOo_k
Create a Script
First thing is to extract the zipped folder that was download, “sqlite-dll-win64-x64-3310100” folder is the first folder to extract and must be extracted next to the AHK script as we will use the #include directive or modify the #include to the extracted path.
File Structure
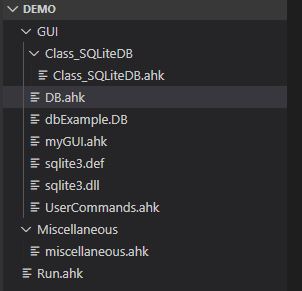
The file structure looks like this because in the next blog we will intergrate this DB concept with the GUI that was introduced in the previous blog. In this blog the new files are Class_SQLiteDB folder containing Class_SQLiteDB.ahk, DB.ahk(the script that we will run), dbExample.DB (The Database), Sqlite3.def, and sqlite3.dll.

To start off in the DB.ahk,we import the code of script for SQLite created by Just Me. create a variable for a database path to be read or create a new database if it doesn’t exist.
Open database

Here at line 11 we create an object of class SQLiteDB in the Class_SQLiteDB.ahk script. Next we open the database by using the method OpenDb and passing in three arguments first is the database file path, second is the access “W”rite, “R”ead, third a boolean whether the database should be created if the database file doesn’t exist. OpenDb will return false if there was any error that occurred during opening the database.
Close Database

Database should be close whenever the job with the database is done, persisting any change and deallocate memory.
Create Table
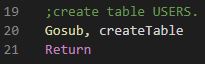
When we first create the database there will be no table in it, so we will create a table using label and Gosub that we learn previously.

In the createTable label we want to first create the query just like in Java but without the getConnection() as we already have the connection to the database. Creating the table is the same like SQL. What is different is that we use Exec() method to execute the query in the database (in java it would be executeUpdate() ), Exec() will return true or false, false being there’s an error and true if the execute update was successful.
DB Browser
To use the external tool that we downloaded, run the “DB Browser for SQLite.exe” executable located in the DB Browser for SQLite folder.


Once the database and table has been created we can use this external tool to verify that it was created by clicking on the “Open Database” at the top right and selecting the DB file that was created when the database was created.

Insert multiple rows
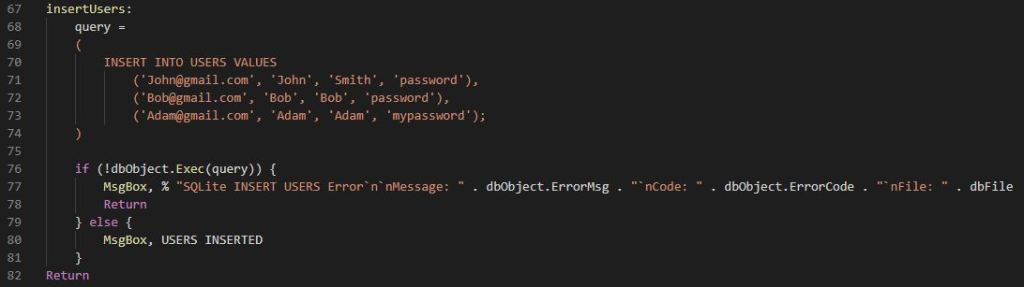
Inserting users query is also the same as you would in SQL using the INSERT.
Select all
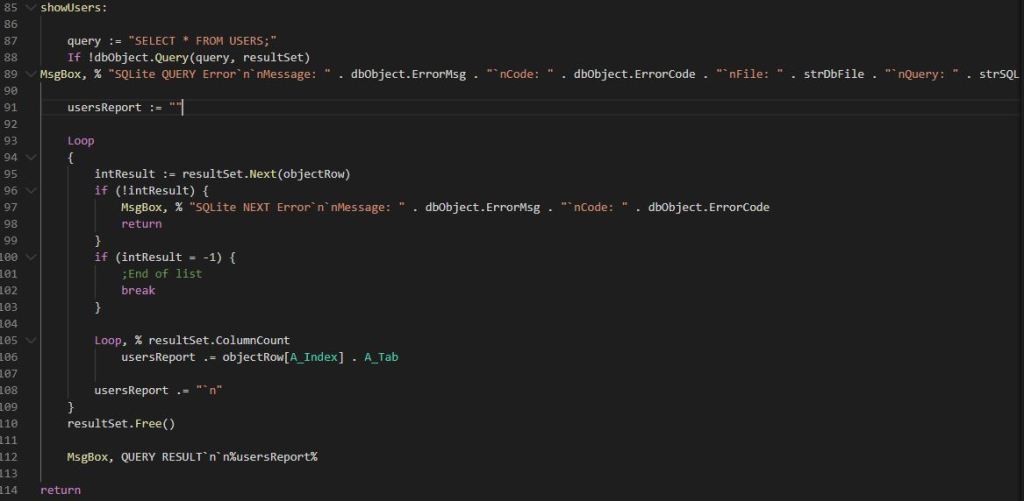
Showing the records in the table gets a little different if we were to do it in Java, the query is the same but where it gets kind of confusing is how we literate each row and there’s different ways to do it but for this blog it is simplified to hopefully help with understand how it works. To execute the query in Line 88 we use the method Query() passing in the query to execute and the resultSet that it will return the rows in the table.
In the loop at line 95 we have to check the state of the row whether there’s an error, end of the list, or a row that we can read which we use the method Next() passing in objectRow that will set that variable to the row that we are currently reading.
Line 105 we literate through each column of the row and concatenate to the report which will display all the users in the table.
Note: A_Tab like pressing the tab button adding spaces. `n inserts a new line for the next row
The last and important part of result set that we do is that when we are done reading the rows we want to release the resources by calling the Free() method, line 110.
Insert
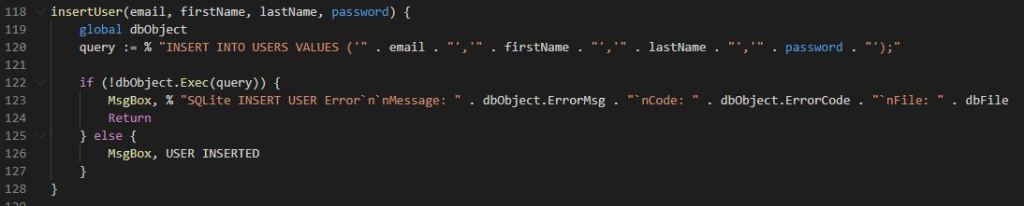
In insertUser() function we use the key work “global” to use the variable dbObject that was introduced in the second blog. The query is a little different in line 120 we use % to say that anything that’s not wrapped in quotes is a variable and . dot is concatenate (in java would be + ).
Delete row

Select specific row

Update

This is the end of this blog as it becoming longer than I would like, so my next blog I will integrate this database concept with our GUI that was introduced last blog. To sum it all up we learned how to install SQLite and used a library to gain the ability to create database in AutoHotKey and learned SQL basics statements. The next blog probably will be the last blog on AutoHotKey.
